Wholesome and Flaky: 100% Whole Wheat Pie Crust
Hello, dear friends and fellow homesteaders! Up here in the beautiful mountains of Alaska, we take pride in making the most of the ingredients we have on hand, crafting delicious and nourishing meals from scratch. Today, I’m excited to share one of my favorite recipes: 100% whole wheat pie crust. This crust is not only wholesome and nutritious, but it’s also delightfully flaky and perfect for both sweet and savory pies.
Ingredients:
- 2 cups whole wheat flour
- 1 teaspoon salt
- 3 tablespoons sugar (optional, for sweet pies)
- 1 cup cold unsalted butter, cut into small cubes
- 1/4 to 1/2 cup ice water

Instructions:
1. Prepare Your Ingredients: Start by measuring out all your ingredients. It’s important to keep the butter cold, so I usually cut it into cubes and pop it back in the fridge while I get everything else ready.
2. Mix the Dry Ingredients: In a large bowl, whisk together the whole wheat flour, salt, and sugar (if using). This ensures that everything is evenly distributed before we add the butter.
3. Cut in the Butter: Add the cold, cubed butter to the flour mixture. Using a pastry cutter, fork, or your fingers, cut the butter into the flour until the mixture resembles coarse crumbs with pea-sized pieces of butter. This step is crucial for achieving that flaky texture we love in pie crusts.

4. Add Ice Water: Slowly add the ice water, one tablespoon at a time, stirring gently with a fork or your hands until the dough just comes together. Be careful not to overwork the dough; it should still have some visible bits of butter throughout.

5. Form the Dough: Divide the dough in half and shape each half into a disk. Wrap the disks in plastic wrap or an air tight container and refrigerate for at least an hour. This resting time helps the dough hydrate and makes it easier to roll out.
6. Roll Out the Dough: On a lightly floured surface, roll out one disk of dough to fit your pie pan. Start from the center and work your way out, turning the dough occasionally to prevent sticking. Aim for a thickness of about 1/8 inch.

7. Assemble Your Pie: Gently transfer the rolled-out dough to your pie pan, pressing it into the bottom and sides. Trim any excess dough, leaving a small overhang if you’re making a double-crust pie. Add your desired filling, then roll out the second disk of dough and place it over the top, if using. Crimp the edges to seal and cut a few small slits in the top crust to allow steam to escape.

8. Bake Your Pie:
- For a fully baked pie crust: Preheat your oven to 375°F. Bake for 40 to 50 minutes. Generally, whole wheat crusts may take a few minutes longer to bake than white flour crusts, so keep an eye on it and cover the edges with foil if they start to brown too quickly.
- For a par-baked pie crust: Preheat your oven to 375°F. Roll out the dough and fit it into your pie pan. Line the crust with parchment paper and fill with pie weights or dried beans (if you do not have parchment paper, you can use an oven safe dish to weigh the crust down). Bake for 15-20 minutes, then remove the weights and parchment and bake for an additional 5-10 minutes, until the crust is lightly golden.

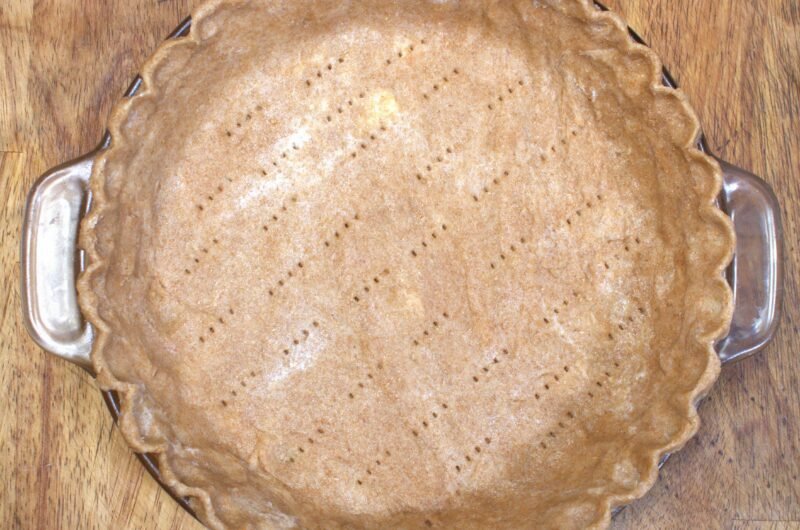
Par Baked Pie Crust

Fully Baked Pie Crust
Homestead Tips:
- Keep it Cold: The key to a flaky crust is cold ingredients. You can even chill your mixing bowl and utensils for an extra edge.
- Butter Substitutes: If you prefer, you can use a combination of butter and lard or shortening for a different texture and flavor.
- Make Ahead: This dough can be made ahead of time and stored in the fridge for up to two days or frozen for up to three months. Just thaw it in the fridge overnight before using.
Living in the Alaskan mountains, we cherish the comfort and satisfaction that comes from baking at home. This 100% whole wheat pie crust is a testament to that, offering a nutritious and hearty base for all your favorite pies. Whether filled with sweet berries from a summer harvest or savory vegetables from our fall garden, this crust brings a wholesome touch to every meal.
So, roll up your sleeves, gather your ingredients, and bake a pie that not only warms your home but also nourishes your body and soul. From our cozy homestead kitchen to yours, happy baking!
Stay warm and happy cooking from our Alaskan homestead to yours!
100% Whole Wheat Pie Crust
Course: DessertCuisine: AmericanDifficulty: Easy8
servings15
minutes40
minutes295
kcal2
CrustsEnjoy the wholesome goodness of a flaky pie crust made with 100% whole wheat flour. This nutritious and delicious crust is perfect for both sweet and savory pies, offering a hearty base for your favorite fillings. Follow these simple steps to create a homemade pie crust that’s sure to impress.
Ingredients
2 cups whole wheat flour
1 teaspoon salt
3 tablespoons sugar (optional, for sweet pies)
1 cup cold unsalted butter, cut into small cubes
1/4 to 1/2 cup ice water
Directions
- Prepare Your Ingredients: Start by measuring out all your ingredients. It’s important to keep the butter cold, so I usually cut it into cubes and pop it back in the fridge while I get everything else ready.
- Mix the Dry Ingredients: In a large bowl, whisk together the whole wheat flour, salt, and sugar (if using). This ensures that everything is evenly distributed before we add the butter.
- Cut in the Butter: Add the cold, cubed butter to the flour mixture. Using a pastry cutter, fork, or your fingers, cut the butter into the flour until the mixture resembles coarse crumbs with pea-sized pieces of butter. This step is crucial for achieving that flaky texture we love in pie crusts.
- Add Ice Water: Slowly add the ice water, one tablespoon at a time, stirring gently with a fork or your hands until the dough just comes together. Be careful not to overwork the dough; it should still have some visible bits of butter throughout.
- Form the Dough: Divide the dough in half and shape each half into a disk. Wrap the disks in plastic wrap or an air tight container and refrigerate for at least an hour. This resting time helps the dough hydrate and makes it easier to roll out.
- Roll Out the Dough: On a lightly floured surface, roll out one disk of dough to fit your pie pan. Start from the center and work your way out, turning the dough occasionally to prevent sticking. Aim for a thickness of about 1/8 inch.
- Assemble Your Pie: Gently transfer the rolled-out dough to your pie pan, pressing it into the bottom and sides. Trim any excess dough, leaving a small overhang if you’re making a double-crust pie. Add your desired filling, then roll out the second disk of dough and place it over the top, if using. Crimp the edges to seal and cut a few small slits in the top crust to allow steam to escape.
- Bake Your Pie: For a fully baked pie crust: Preheat your oven to 375°F. Bake for 40 to 50 minutes. Generally, whole wheat crusts may take a few minutes longer to bake than white flour crusts, so keep an eye on it and cover the edges with foil if they start to brown too quickly.
For a par-baked pie crust: Preheat your oven to 375°F. Roll out the dough and fit it into your pie pan. Line the crust with parchment paper and fill with pie weights or dried beans (if you do not have parchment paper, you can use an oven safe dish to weigh the crust down). Bake for 15-20 minutes, then remove the weights and parchment and bake for an additional 5-10 minutes, until the crust is lightly golden.
Recipe Video
Notes
- Keep it Cold: The key to a flaky crust is cold ingredients. You can even chill your mixing bowl and utensils for an extra edge.
- Butter Substitutes: If you prefer, you can use a combination of butter and lard or shortening for a different texture and flavor.
- Make Ahead: This dough can be made ahead of time and stored in the fridge for up to two days or frozen for up to three months. Just thaw it in the fridge overnight before using.